How to Setup Learner Profiles on your eLearnCommerce Powered eLearning Platform.
Technical Requirements:
- At least eLearn Commerce Version 1.9
- The eLearnCommerce Content Sales Engine Addon or your favorite Membership Plugin.
eLearnCommerce integrates with ALL Membership Plugins for WordPress.
If you use Memberium, Wishlist Member, S2 Member, MemberPress, MemberMouse, Digital Access Pass, InstaMember or DigiMember, make sure you install the eLearnCommerce Deep Integration Addon as well, which you can find here.
If all Plugins are installed on your WP site, you’re ready to proceed.
Setting Learner Profiles up is easier than easy with eLearnCommerce.
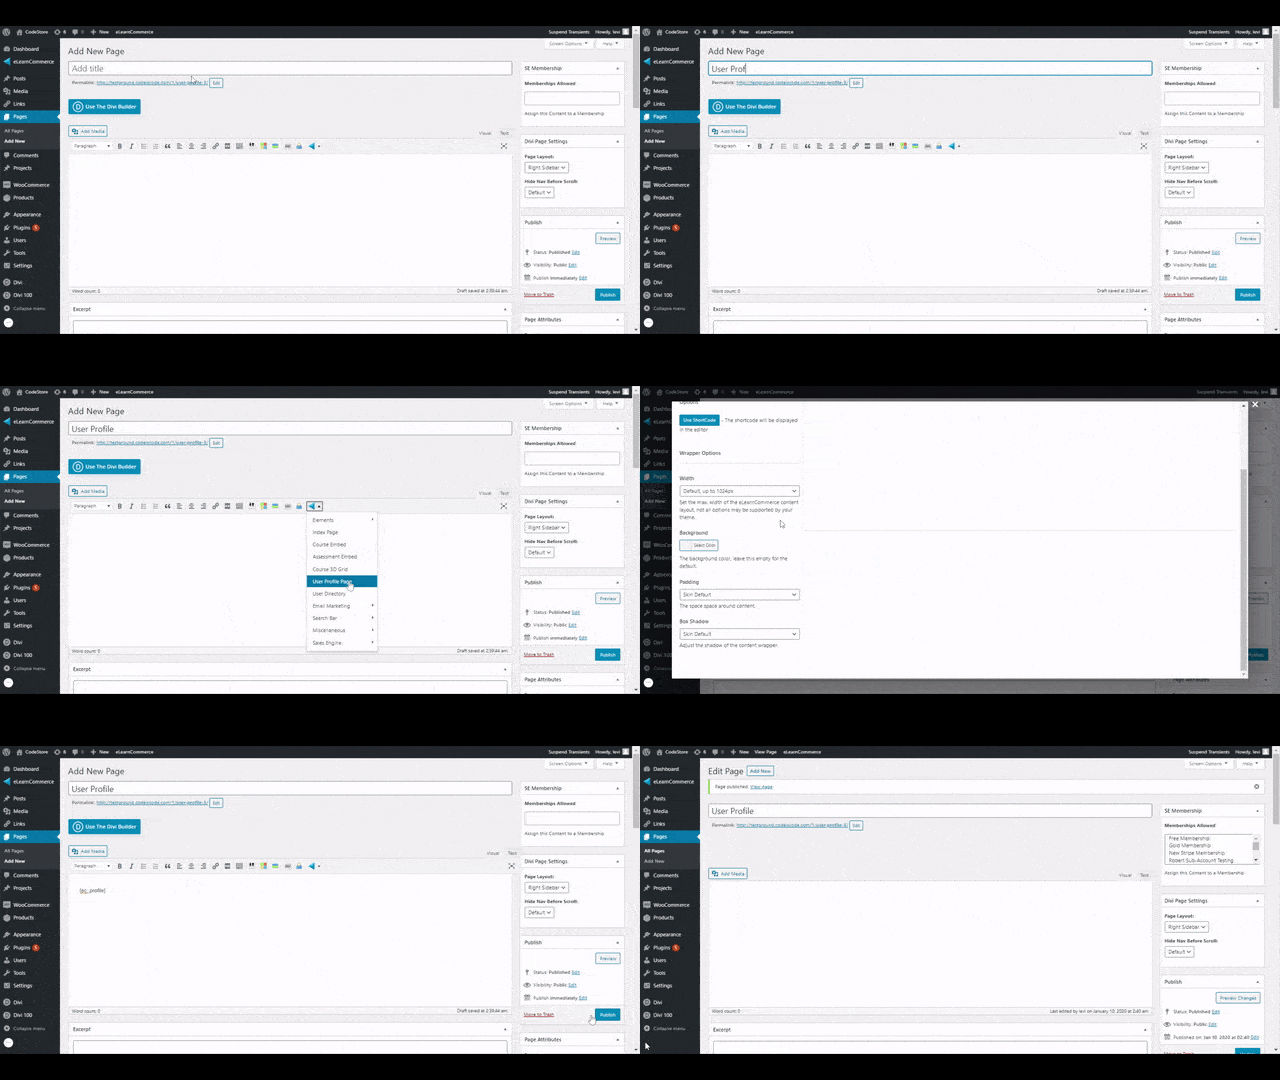
Just a few Mouse-clicks are required, check this gif:

The 3 basic steps to setup Learner Profiles
Step 1.: Create a Page on your WordPress and name it Learner Profile, User Profile or anything else.
Step 2.: Click on the eLearnCommerce Shortcode Builder and choose the User Profile Page Shortcode.
Step 3.: Customize your Shortcode and then click “Use Shortcode”. Save your Page.
DONE!
Practical Guidelines
A few practical guidelines on how to set up learner profiles and how you can design your Customer and/or Member Journey on your eLearning Platform.
Scenario 1:
The Buying of Content happens away from the Learner Profile. (Buying & Consumption of Content happens on separate Pages).
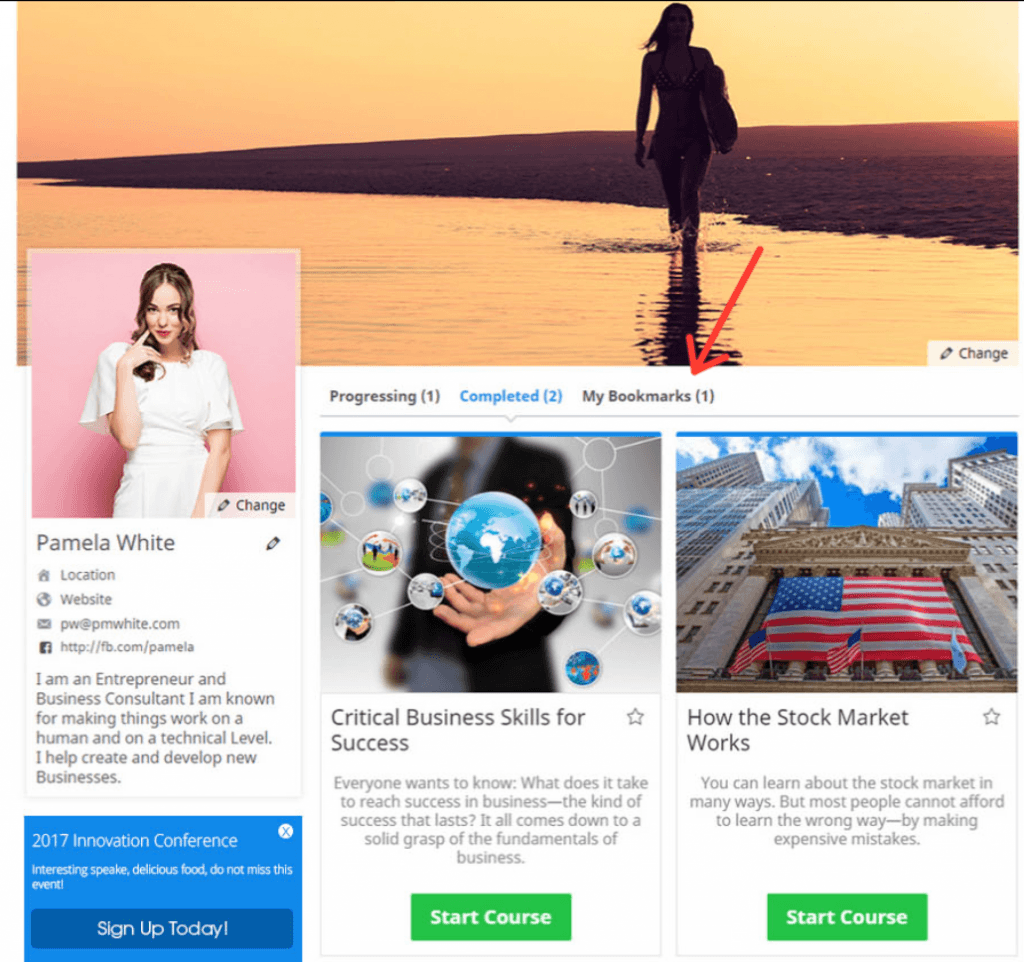
Your Learners use the Learner Profile to see the Courses they started, the Courses they completed, the Courses they bookmarked, their achievements (if Badge OS is active) and their Certificates (if applicable).
In this case, you could create an Index Page using the eLearnCommerce Index Page Shortcode Builder or use the native eLearnCommerce Index Page on Page A and then create your Learner profiles on Page B.
Scenario 2:
Buying & Consumption of Content both happen on the learner profile. Buying + overview of Courses started, Courses completed, Courses Bookmarked, list of achievements (if Badge OS is active), list of Certificates (if applicable).
In each one of the 2 scenarios, your Learners will land on their Learner Profile when they come back to your site and log back in.
NOTE: You can also mix and match these two scenarios and you can also not use the Learner Profiles at all and use the eLearnCommerce Index Page by itself.
Once you learn how to implement each one, you can get creative!
For now, let’s stick with these two different use cases.
To implement scenario 1 (buying and consumption of content are separate) follow these steps.
Step 1.: Setup your Learner Profile as explained at the beginning of this documentation. Here they will consume the Content.
Step 2.: Create your Course and Content Index page anywhere on your WordPress on a separate URL.
Step 3.: Use a Plugin like Nav Menu Roles to allow your Learners to easily navigate your site.
NOTE: to Implement scenario 2 (buying and consumption both happen on the learner profile), follow these steps to add Custom Tabs ie. additional navigation items on the Learner Profile.
This enables you to display any eLearnCommerce Courses and Content within the Profile.
These are Tabs ie. Learner Profile Navigation Items.

How to add Custom Tabs or additional navigation items to the Learner Profile.
Custom Tabs will not be displayed publicly. Only the profile owner and staff and admin will be able to view them.
Step 1.: Setup your Learner Profile as explained at the beginning of this documentation.
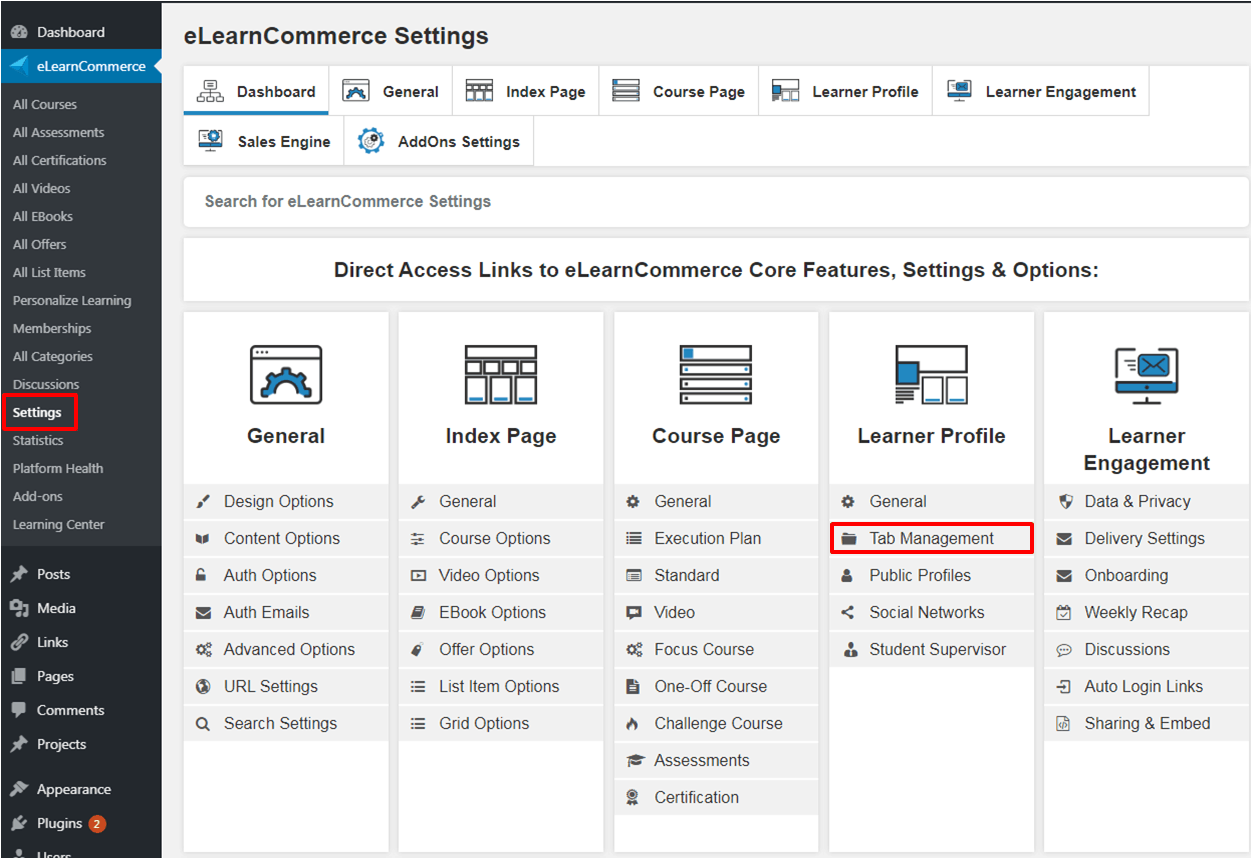
Step 2.: Add Custom Tabs to your Learner Profile to display your Index Pages and/or Courses or Content you’d like to sell to your Learners. In order to do this Go to eLearnCommerce Settings –> User Profile —> Tab Management

Step 3.: On the page that opens, scroll down.
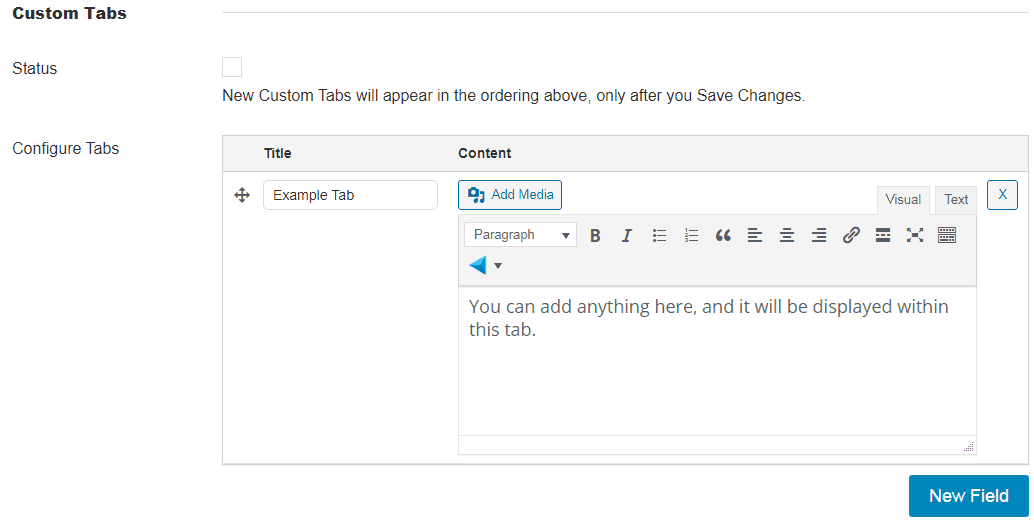
Step 4: Enable Custom tabs.
Step 5.: Choose if the tabs are added on the left, or on the right side of the learner profile navigation items (by default they will be added to the right.)
Step 6.: Enter a title for your Custom tab and then add any Courses and/or Content you’d like to display below that tab on the Learner Profile by using the eLearnCommerce Shortcode Builder.
NOTE: You can add any content into the Content Field (Images, Videos, Text, etc. etc) and use any kind of Shortcode that works within the WP environment.
Step 7.: Add a New Tab Field (there can be an unlimited number of custom tabs & you can reorder them by dragging and dropping).
Step 8. Save Changes.
DONE!

Now Go Create Massive Value!

