Membership Site
The Sales Engine enables you to accept payments using either Paypal, Stripe or Braintree. If you do not have an account with one of these Online Payment Providers go ahead and create your Account now before proceeding with this Execution Plan.
After you’ve successfully set up your Account Follow the steps outlined below to set up your payment gateway in the eLearnCommerce Sales Engine Addon.
NOTE! The Sales Engine allows you to use only 1 Payment Gateway at any given time.
Step 1: Setup Your Payment Gateway in the eLearnCommerce Sales Engine.
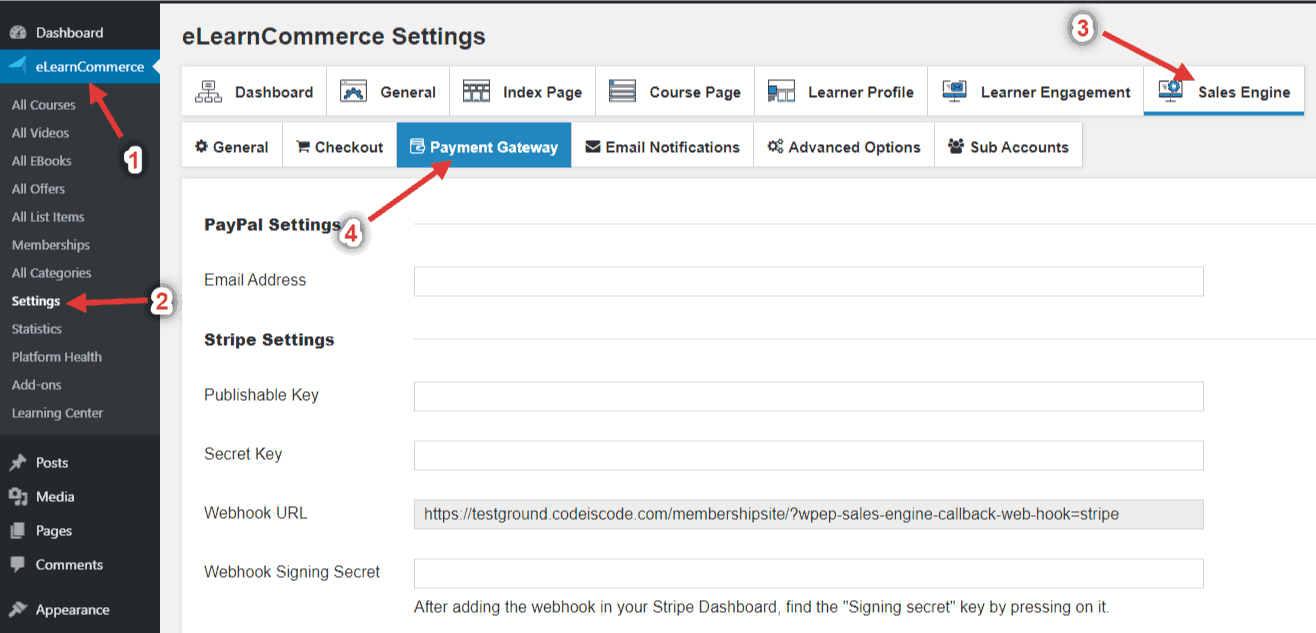
On your 1.: eLearnCommerce Dashboard click on 2.: Settings then click 3.: Sales Engine > 4.: Payment Gateway > Save Changes
Step 2: How to Create A Membership
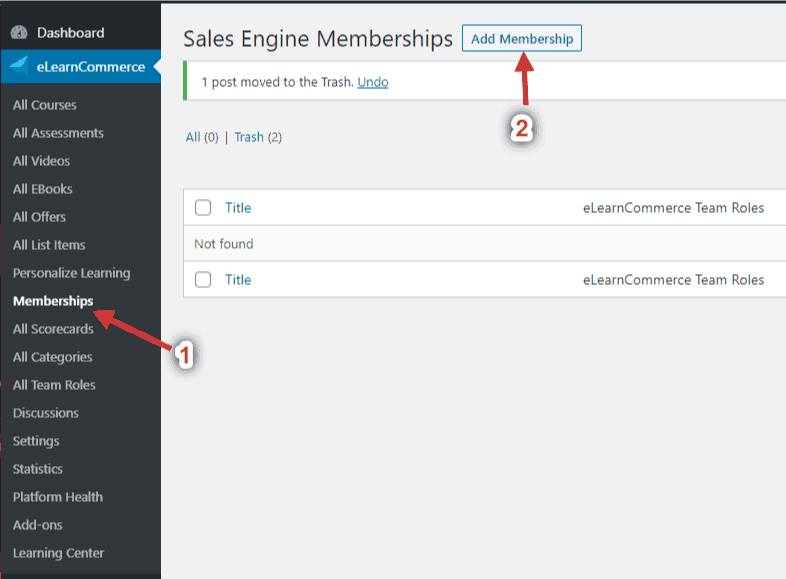
1.: Go to your WordPress Dashboard and Click eLearnCommerce >> Settings
2.: Click Add Membership
3.: Give your Membership a Name (Gold, Silver, Platinum, etc.)

4.: Enter how much you want to charge for your Membership.

5.: Choose your Membership Payment Frequency. Do you want to charge your Customers once, daily, weekly, monthly, or yearly?

6.: Choose Your Payment Processor. (You can select: Paypal, Stripe, Braintree, Thrivecart, Samcart, Sendowl, and Paykickstart.)

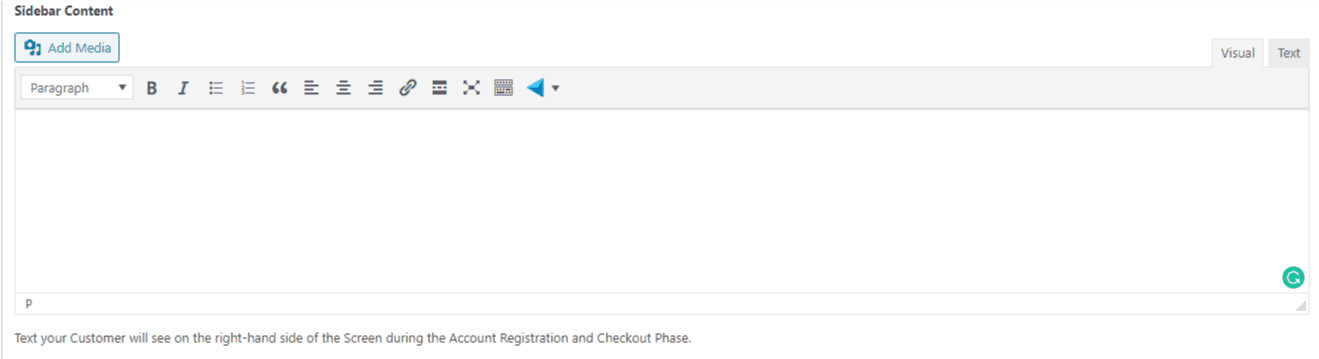
7.: Insert Your Checkout Process Sidebar Content Text. This is the Text that your Customer will see on the right-hand side of the Screen during the Account Registration and Checkout Phase. You want to insert text that tells your Customer what he is getting/buying from you, here you can also outline your Money Back Guarantee or anything else that you’d like to communicate to your customer the moment before he pays you.
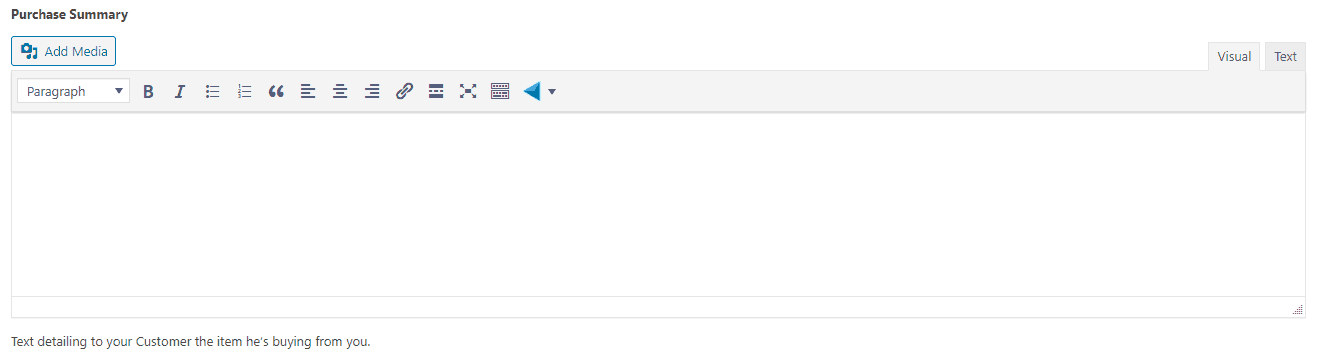
8.: Insert your Purchase Summary Text. This is the Text that your Customer will read before clicking on the last Step of the Purchase & Checkout Process.
9.: Insert a short Description for your Membership listing what it contains.

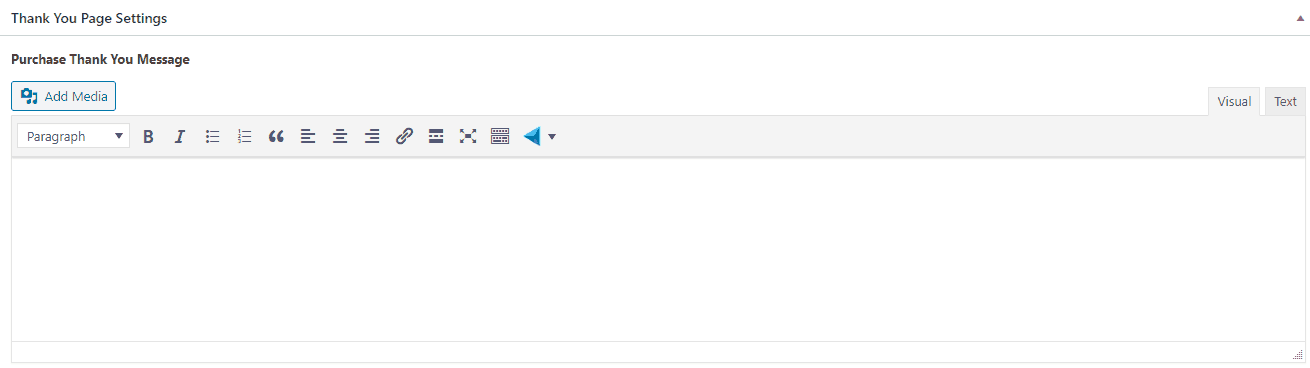
10.: Insert your Purchase Thank You Message
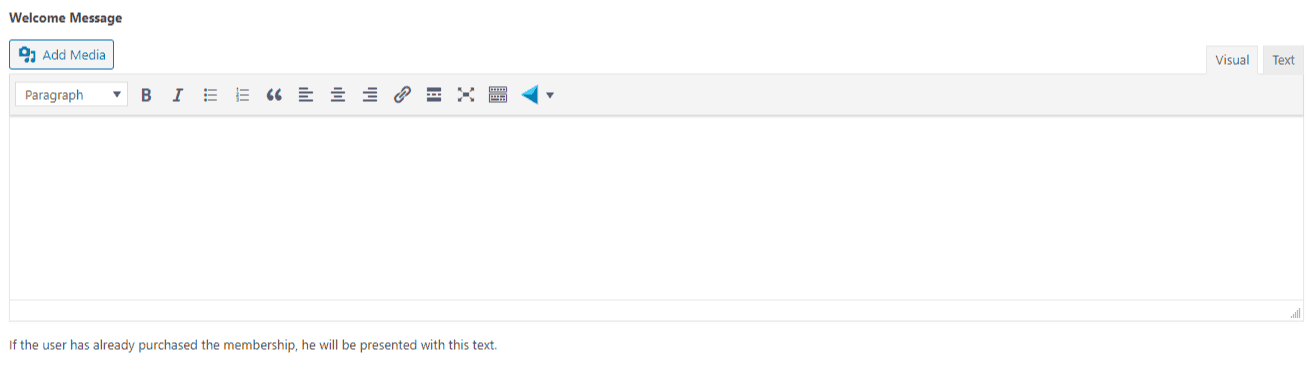
9.: Insert your Welcome Message for returning Members and/or Customers. This is the Message your Members will see at the top of their Members Area which they will automatically access after having purchased your Membership.
IMPORTANT! If you are selling NON eLearnCommerce Content like access to Blog Posts or Pages on your WordPress insert links that will redirect your Member to this Content here in this Text.
Step 3: How to Add a Course or Content to your Membership
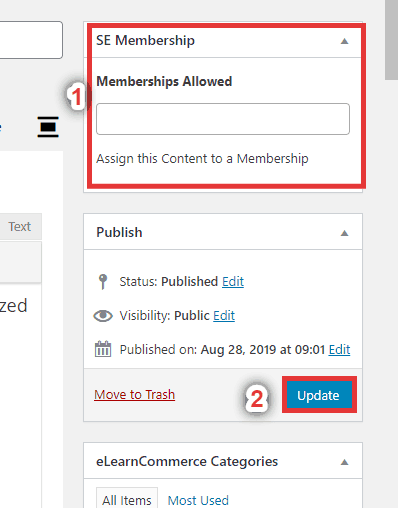
1.: On the Course Edit Page go to the Sales Engine Membership Section and Assign the Course to the Membership by choosing it from the DropDown Menu.
2.: Click Update
Step 4: How to Sell Access to your Membership
1.: Go to your Edit Membership Page and copy the Permalink URL of the Membership you created to your Clipboard.

2.: You can now use any type of WordPress Page Builder to create your Landing and/or Offer or Sales Page to sell Access to Your Membership, you could also use an external Tool like Leadpages.net or just write a BlogPost on your WordPress Blog and set a Hyperlink using the Permalink URL of your Membership.
Step 5: How to Setup the Sales Engine to Sell Your Courses

3.: Insert Your Checkout Process Sidebar Content Text. This is the Text that your Customer will see on the right-hand side of the Screen during the Account Registration and Checkout Phase. You want to insert Text that tells your Customer what he is actually getting/buying from you, here you can also outline your Money Back Guarantee or anything else that you’d like to communicate to your customer the moment before he pays you.
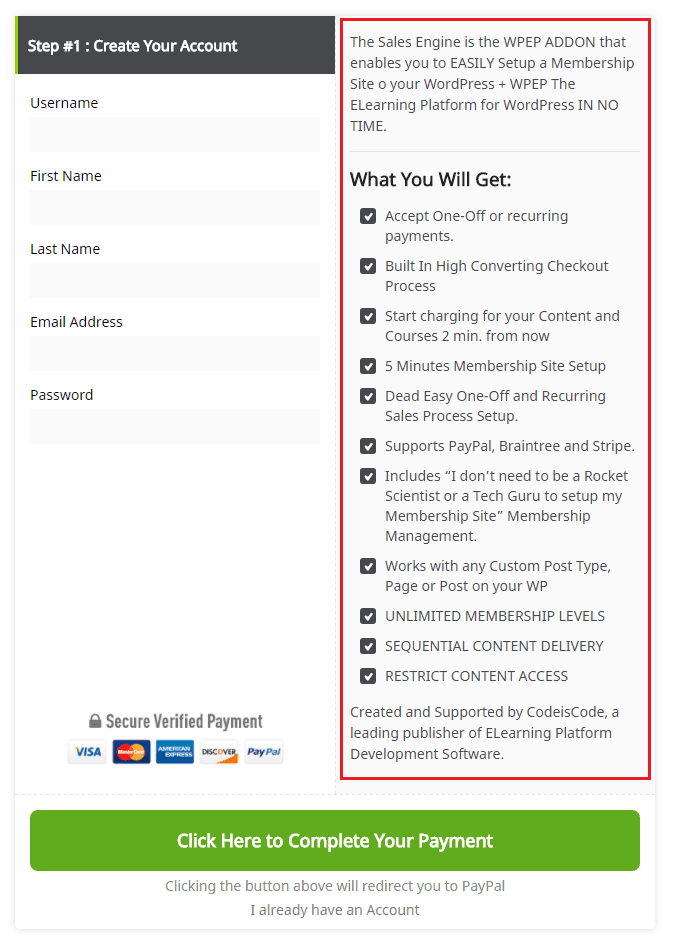
The Text you enter here in the Sidebar Content field will show during the Account Registration & Checkout Process on the right-hand side here:
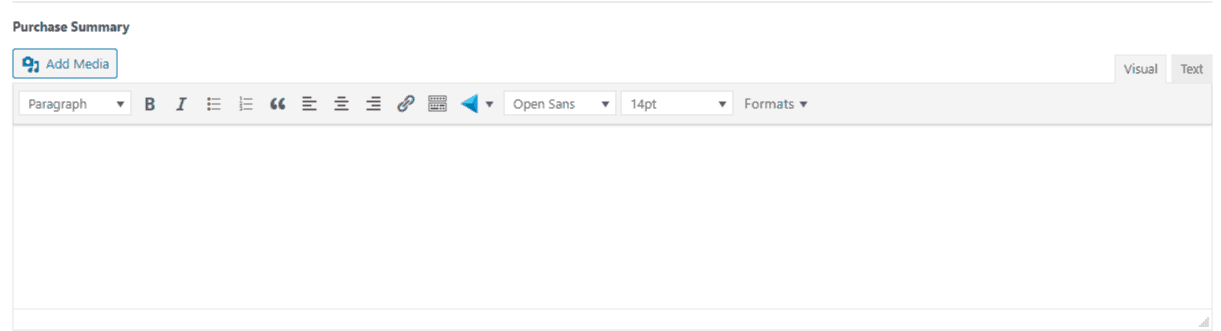
4.: Insert your Purchase Summary Text. This is the Text that your Customer will read before clicking buy on the last Step of the Purchase & Checkout Process.
5.: Enter how much you want to charge for your Course.
6.: Choose Your Payment Processor
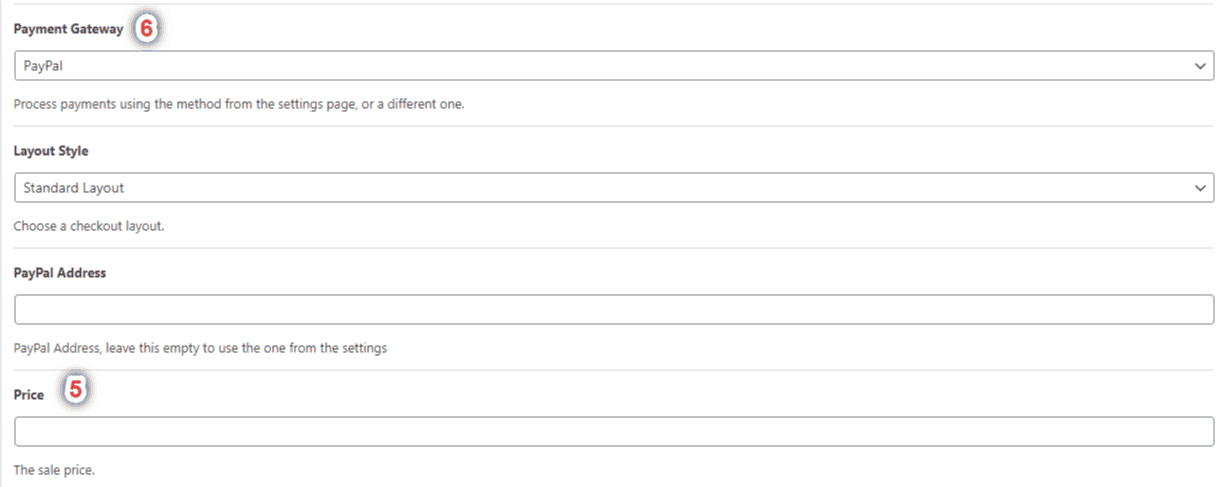
7.: (Optional) Insert a URL that redirects to a Sales Page for your Course.

IMPORTANT!
If you insert a URL here that redirects the User to a Sales Page for your Course. On this page, you will have to place a Buy Button. It is important that the URL on that button corresponds to the Permalink of the Course you are Selling.
You can get the Permalink of your Course on the Course Edit Page here:

