Personalized Learning Module
Step 1 – Get Started
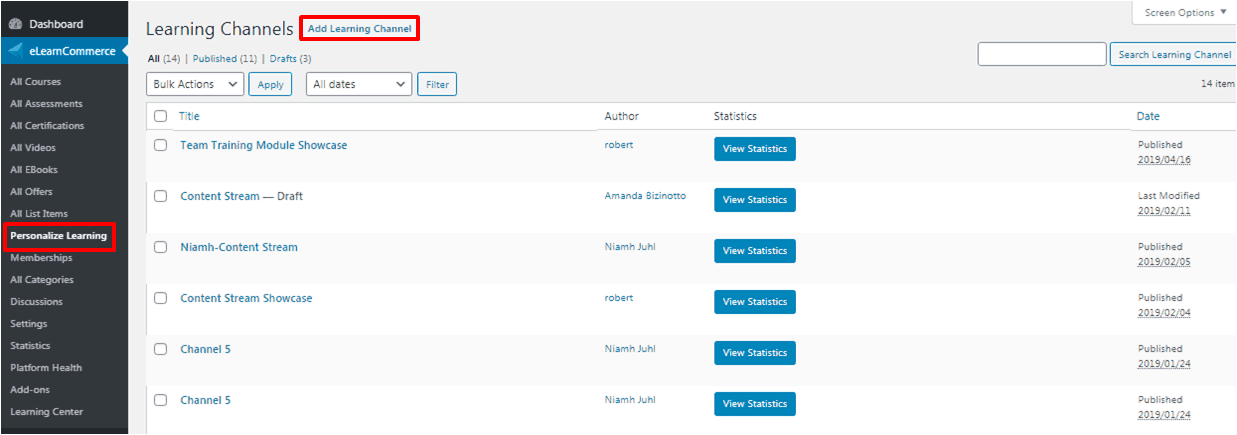
The first thing you need to do is to create a Learning Channel.
To do this, go to Personalize Learning and click Add Learning Channel.
Step 2 – Creating a New Channel
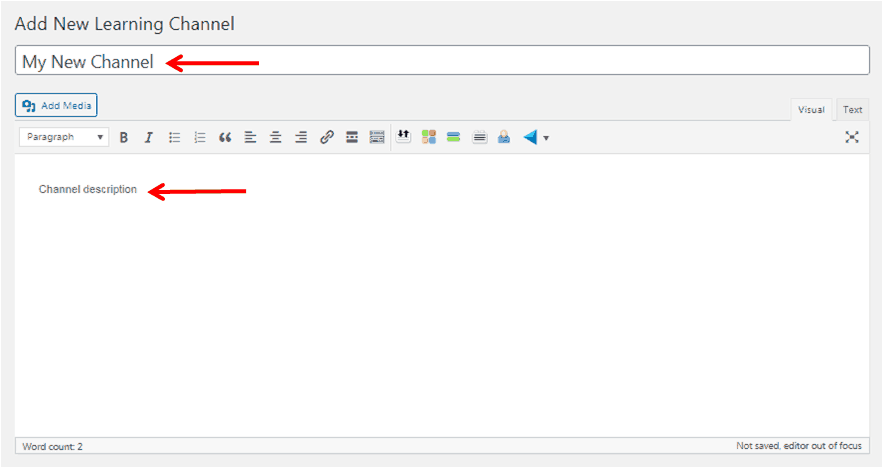
Give your Channel a name and a description.
Step 3.1 – Private or Group Conversations
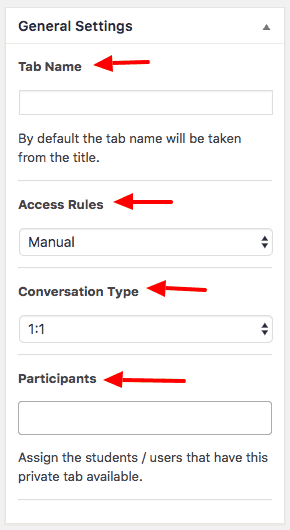
To set up a Learning Channel to have private 1:1 or group conversations, go to the General Settings tab and:
- Choose a tab name (this is the name that will be displayed in the course tab in the Learner’s Profile).
- Set the access rules to manual, automated, or open (free). Manual means you will have to manually add students and teachers to the channel to give them access. Automated means students that are part of a membership will be automatically added to the channel. Open means the channel is open to anyone.
- Choose the conversation type for that channel (private 1:1 or group)
- Depending on the access rule chosen, you will see the proper fields to add the participants to the channel (this option will be hidden for open channels).
Step 3.2 – Sell Memberships
You can also use your learning channel to sell memberships online in an automated fashion.
In order to do that, navigate to the General Settings tab and:
- Choose a tab name (this is the name that will be displayed in the course tab in the Learner’s Profile).
- Set the access rules to automated.
- Choose the conversation type for that channel (private 1:1 or group)
- Select the memberships you’d like to sell through that learning channel using the Memberships Allowed box.
- Leave Sell from Learner Profile enabled for users assigned to the memberships selected to automatically see the tab in their profiles. If this is enabled, add the purchase tab name, the purchase button name and the purchase button link.

Next —> Notifications Master Settings
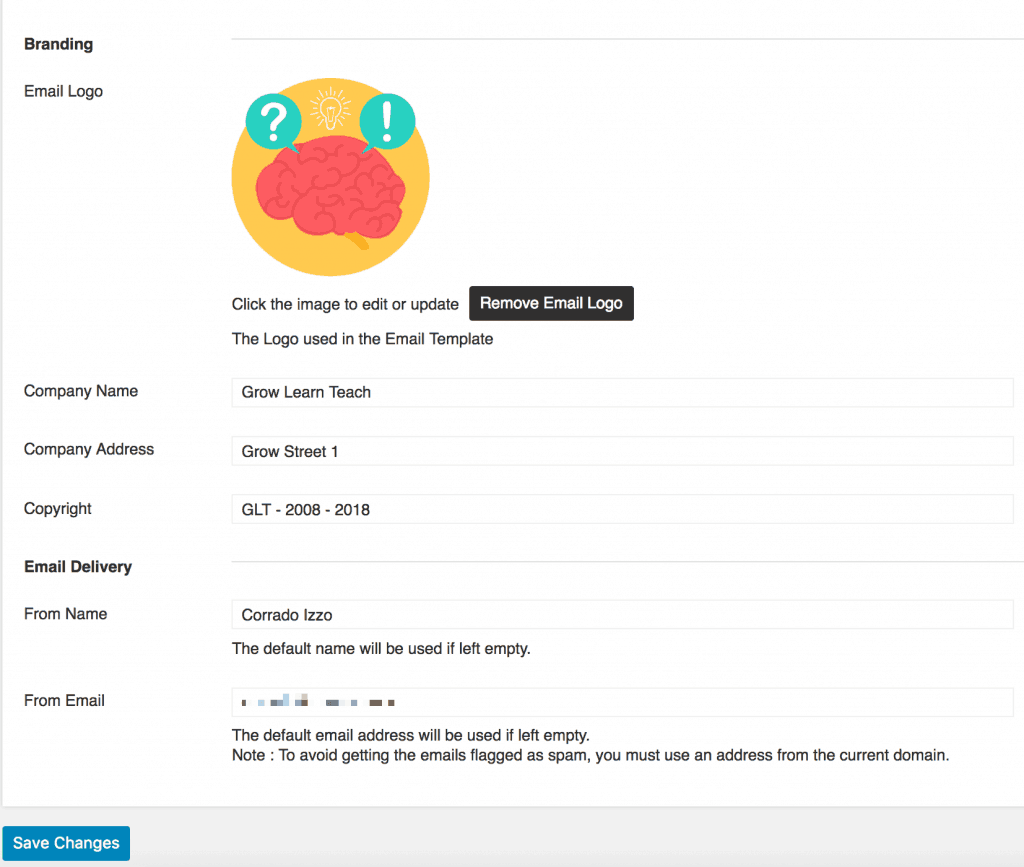
Now you need to Personalize the Private Email Communication with your Student or Group of Students.
Step 1
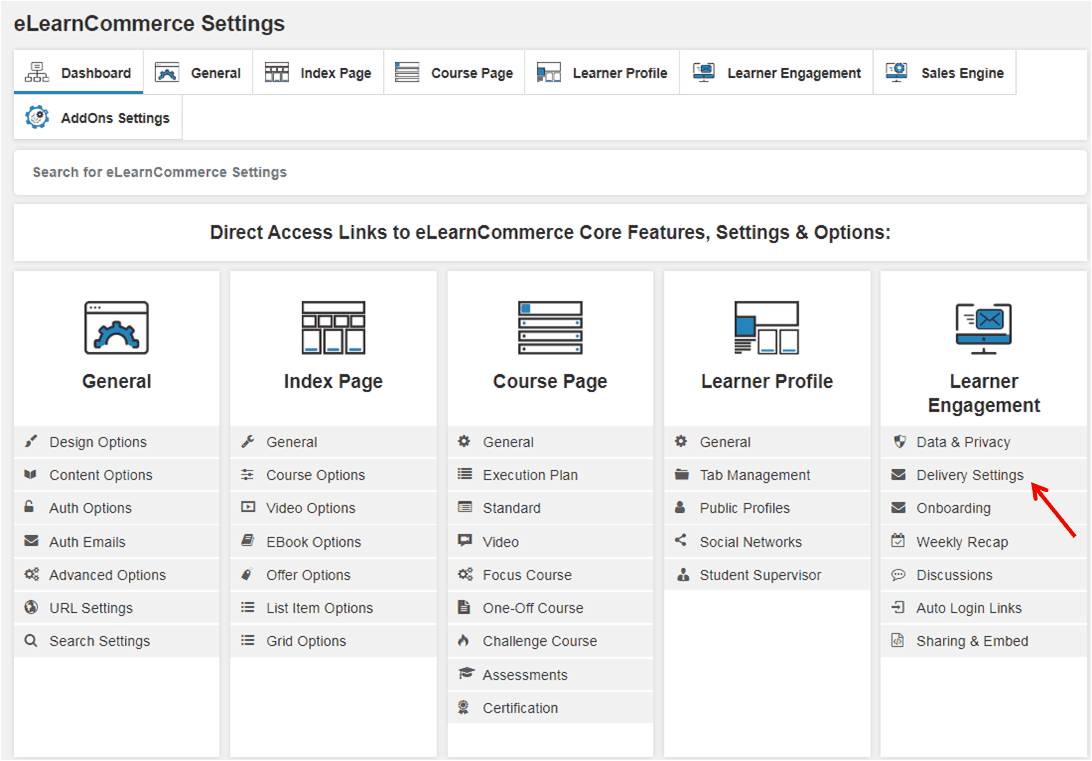
Go to eLearnCommerce —> Settings —> Learner Engagement —> Delivery Settings
Step 2
Upload your Logo and enter all your details.
Step 3
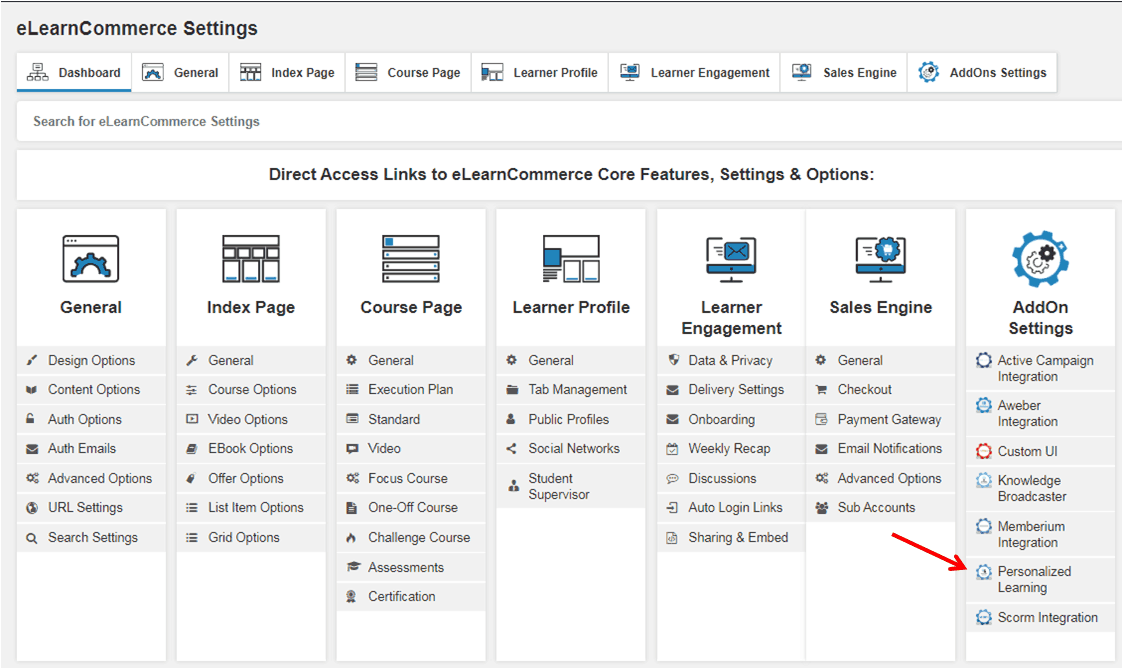
Go to Addons Settings —> Personalized Learning
Next —> Brand Your Domain
You want to customize the Learner Profile Link and brand it to your domain.
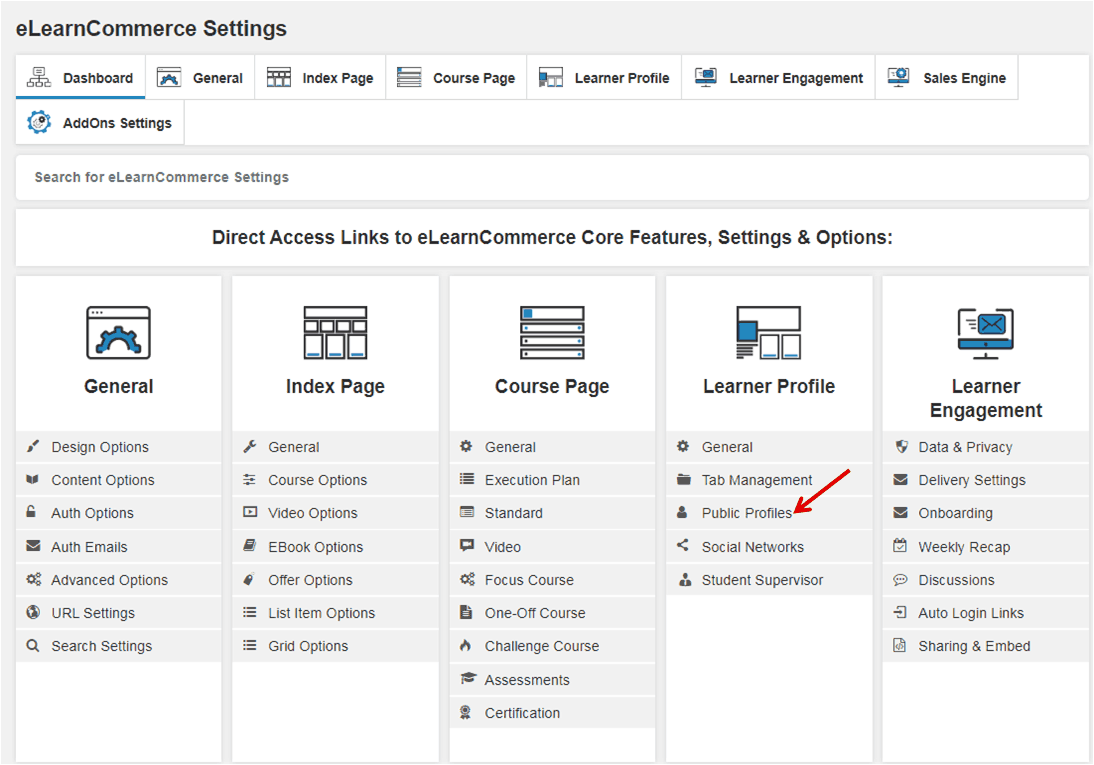
Go to Learner Profile —> Public Profiles
As a default the slug will be: domain.com/wpep-user-profile/username
What you want to do is edit the Profile Slug.
Here you can also decide if you want to show course progress bars and your learner’s private emails on public profiles or not.
Final Step
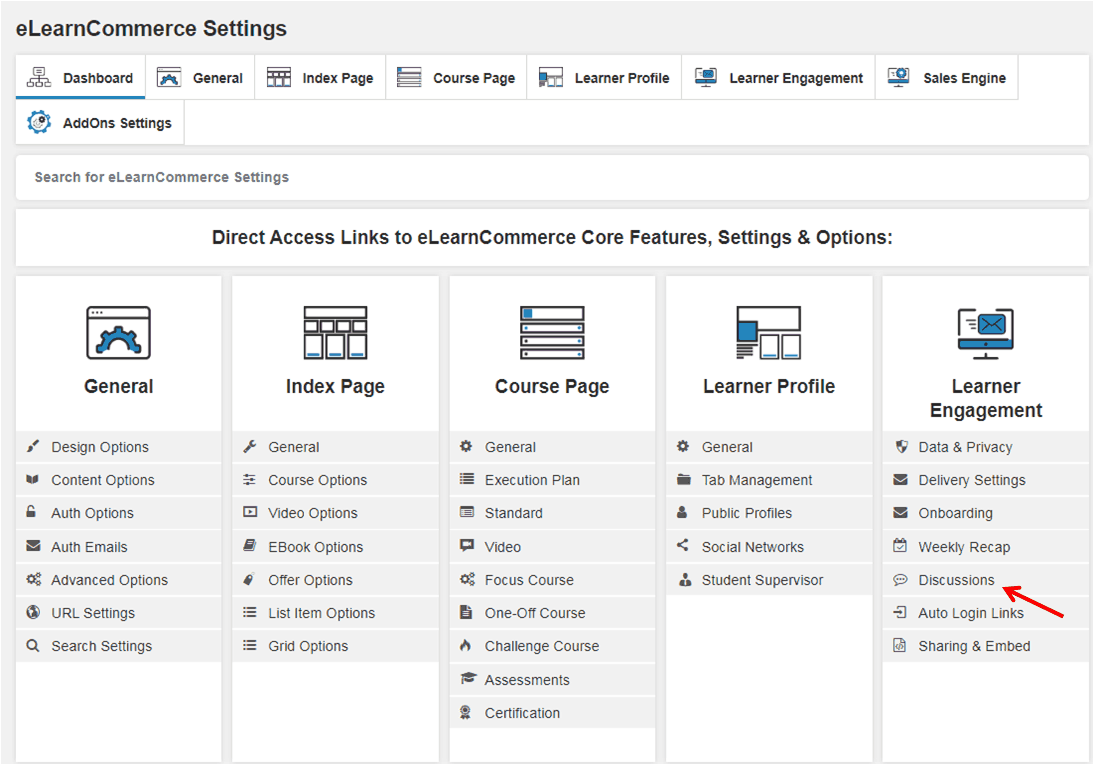
You can further customize the comments by going to Learner Engagement —-> Discussions
